Waiting list
Let customers join a waiting list when your calendar is full, and automatically offer them any slot that opens up.
When your online booking page has no free slots, the waiting list lets a customer ask to be notified instead of leaving without booking — and recovers the slot for you if someone else cancels.
How it works
- A customer joins the waiting list from your booking page when nothing suits them, choosing the service and how much notice they need before an offered slot.
- When an appointment is cancelled or a new slot opens up, Calendia offers it to the next eligible waiting customer by email or SMS.
- If they confirm, it becomes a real booking. If they decline or the offer expires, it passes automatically to the next person in line.
Turn on the waiting list
- Open Company settings and go to the Bookings tab.
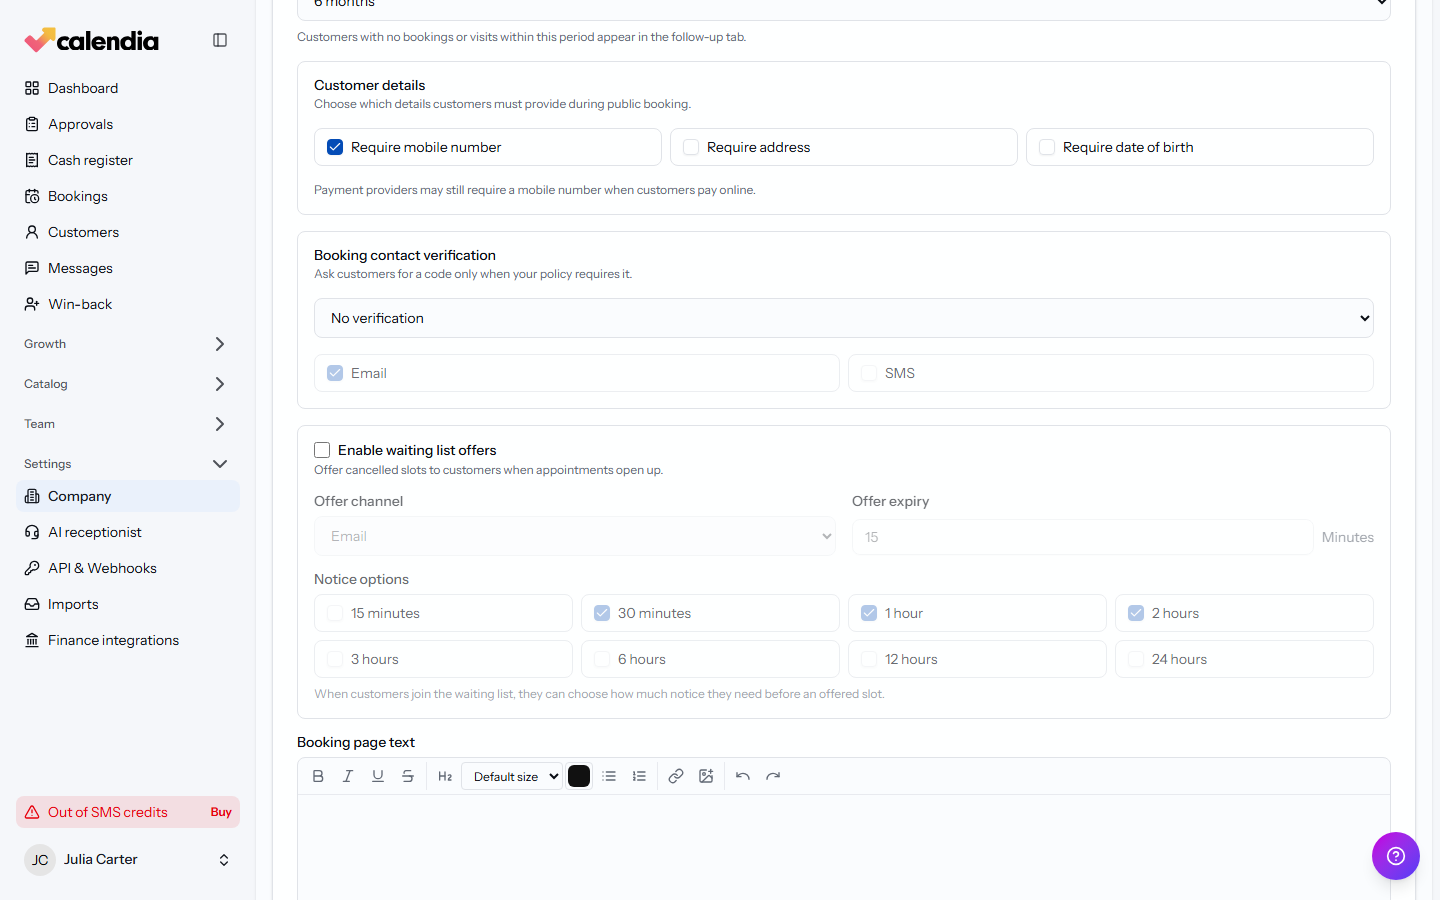
- Tick Enable waiting list offers.
- Set Offer channel to Email, SMS, or Email and SMS.
- Set Offer expiry (in minutes) — how long a customer has to respond before the slot passes to the next person.
- Choose which Notice options customers can pick from when they join, so you never offer them a time they can't make.
- Click Save.
Review who's waiting
On the Bookings page, click the Waiting list button (with a badge showing how many are waiting) to open the panel of everyone currently waiting and any offer that's pending a reply. On the Dashboard, click the amber bar at the bottom of the calendar that says how many people are on the waiting list to open the same panel.
Related articles
Online booking settings
Control how far ahead customers can book, what details they must provide, and whether they pay a deposit, the full price, or nothing at booking.
Create a booking
Add an appointment to the calendar from the Dashboard for a fast walk-in booking, or from Bookings for a full booking with recurrence.
Reminders and notifications
Confirm bookings by SMS, remind customers before their appointment, and nudge them to book again once a treatment wears off.