Online booking settings
Control how far ahead customers can book, what details they must provide, and whether they pay a deposit, the full price, or nothing at booking.
These settings shape what customers see and must provide on your public booking page.
Before you start
Only a manager can change booking settings, and deposits, full prepayment, saved cards and optional pay-now checkout all need a connected Stripe account.
Set your booking window
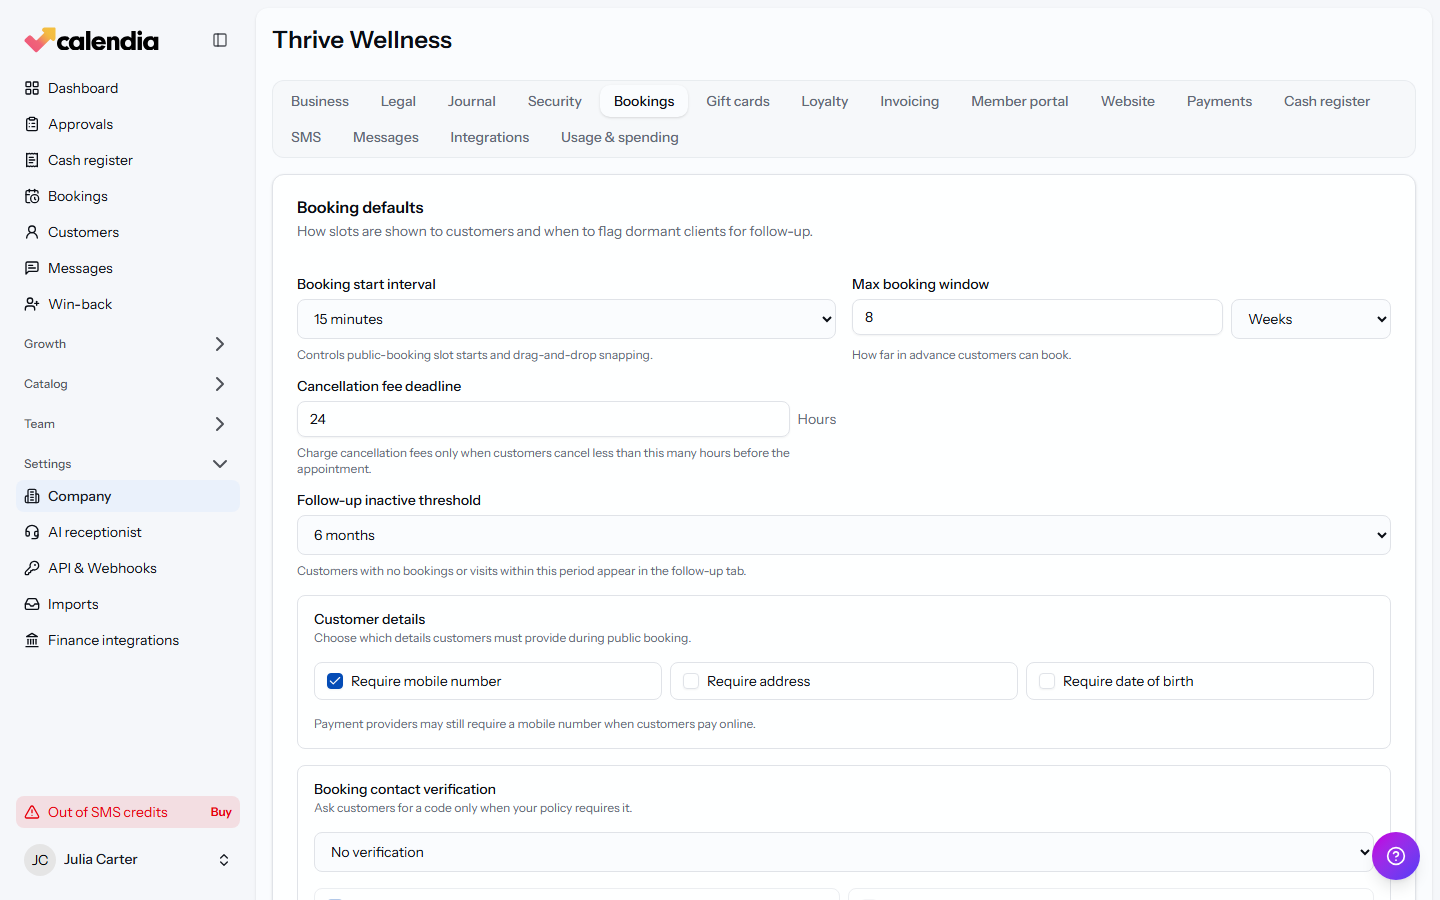
- Open Company settings and go to the Bookings tab.
- Under Booking start interval, choose 30 minutes (standard) or 15 minutes — this controls where public-booking slots start and how drag-and-drop snaps on your calendar.
- Set Max booking window (a number plus Days, Weeks, Months or Years) to control how far in advance customers can book.
- Set Cancellation fee deadline (in hours) so a fee only applies when a customer cancels less than that many hours before the appointment.
- Click Save.
Choose what customers must provide
Still on the Bookings tab, under Customer details, choose exactly what every public-booking customer must provide:
- Require email
- Require mobile number
- Require address
- Require date of birth
- Require social security number
Email and mobile number remain available as optional fields when you do not require them. Address, date of birth and social security number are shown only when required. These rules apply to both the full public booking page and the embeddable booking widget.
Decide how customers pay
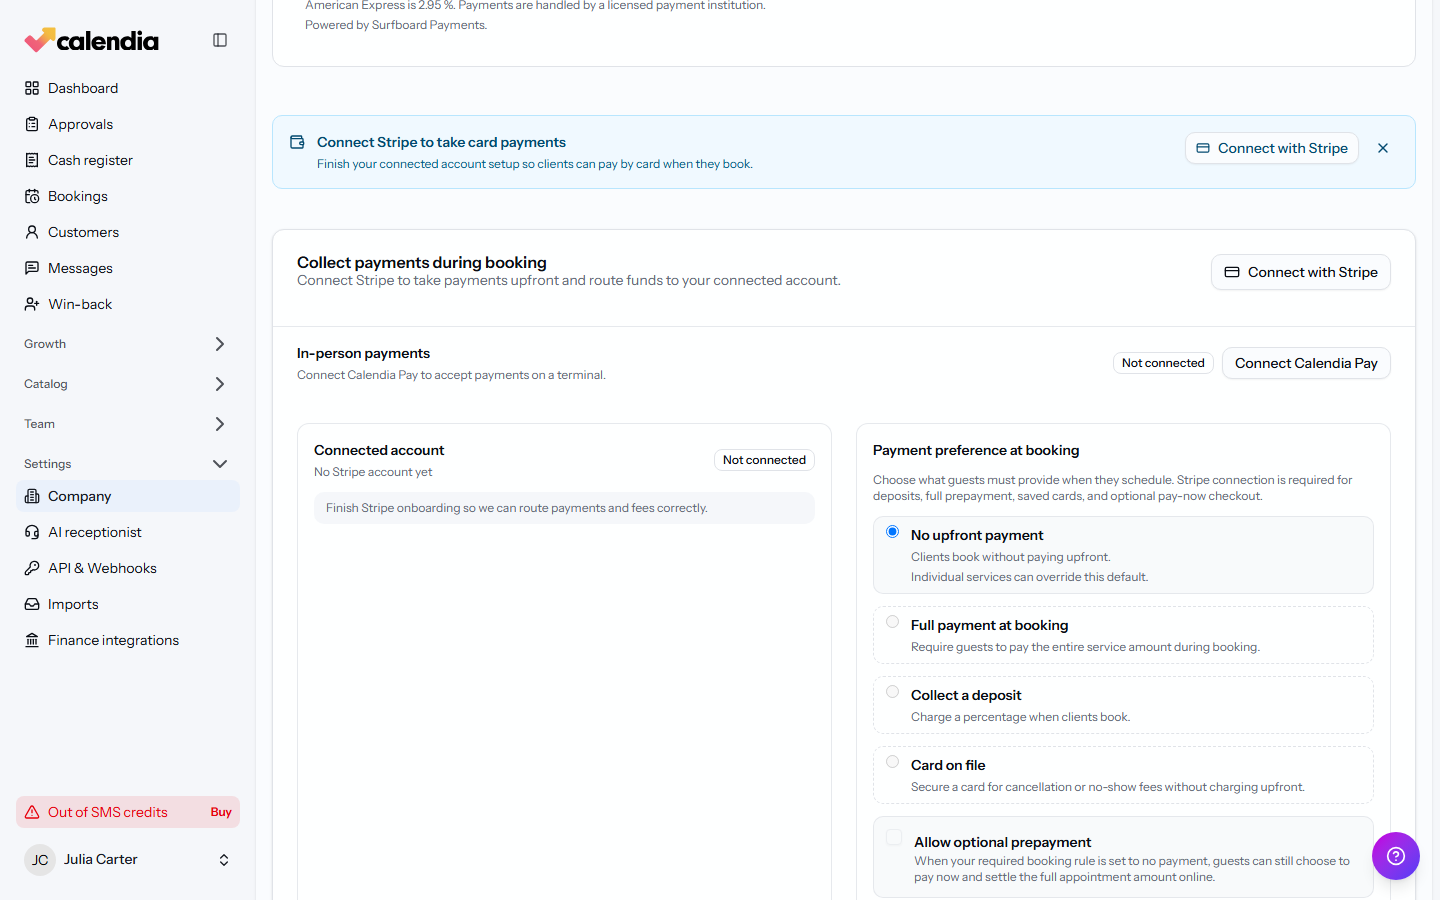
- Go to the Payments tab.
- Under Payment preference at booking, choose one option:
- No payment — customers book without paying upfront (any service can still override this).
- Full payment at booking — the entire amount is charged when they book.
- Collect a deposit — set a Deposit percentage to charge upfront.
- Card on file — secures a card for cancellation or no-show fees without charging anything at booking time.
- Optionally tick Allow optional prepayment so customers can still choose to pay in full even when your default is no payment.
- Click Save payment settings.
For the waiting list settings on the same tab, see Waiting list.
Related articles
Create a booking
Add an appointment to the calendar from the Dashboard for a fast walk-in booking, or from Bookings for a full booking with recurrence.
Waiting list
Let customers join a waiting list when your calendar is full, and automatically offer them any slot that opens up.
Share your online booking page
Find your public booking link, embed a booking widget on your own website, and generate a trackable QR code to share it.
Reminders and notifications
Confirm bookings by SMS, remind customers before their appointment, and nudge them to book again once a treatment wears off.