Welcome to Calendia
A quick tour of the sidebar, your calendar dashboard, and where to find help when you need it.
Calendia brings your calendar, point of sale, customers, and marketing into one workspace. This tour shows you where everything lives so you can find your way around from day one.
The sidebar
Your sidebar is grouped by how you work day to day:
- At the top, with no group label since you'll use them daily — Dashboard, Cash register, Bookings, Customers, Messages, Approvals, and Win-back.
- Growth — Leads, Campaigns, Marketing, QR links, Gift cards, Invoices, Analytics, and Reports.
- Catalog — Services, Products, Membership plans, Inventory, Resources, and Forms.
- Team — Employees, Schedules, Compensation, and Tips.
- Settings — Company, AI receptionist, API & Webhooks, Imports, and Finance integrations.
On a phone or narrow tablet, the sidebar tucks away behind a menu icon in the top bar. Tap it to open the same navigation as a slide-out drawer.
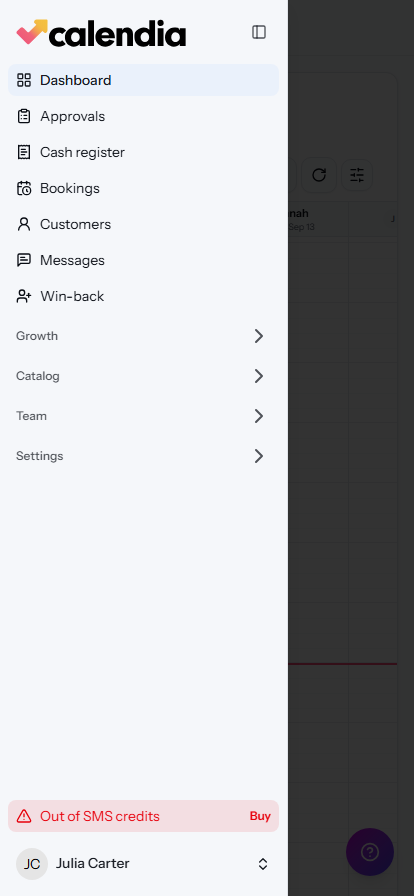
The items you see depend on your permissions. Approvals, between Messages and Win-back, is available to authorized internal and external approvers.
The Dashboard
The Dashboard is your calendar and the page you land on after signing in. Below the calendar grid, Today at a glance shows four live numbers: Working today (bookable team members with availability), Customers booked today, Services provided today, and Services unavailable today — click that last card if it's not zero to see which services currently have no working provider.
The calendar grid itself is where the day happens. Click any empty slot to open Quick book and create an appointment there and then; click an existing appointment to open, move, or update it. Use the Day and Week buttons to switch views, and the Display button to adjust visible hours, row height, and column width to your liking.
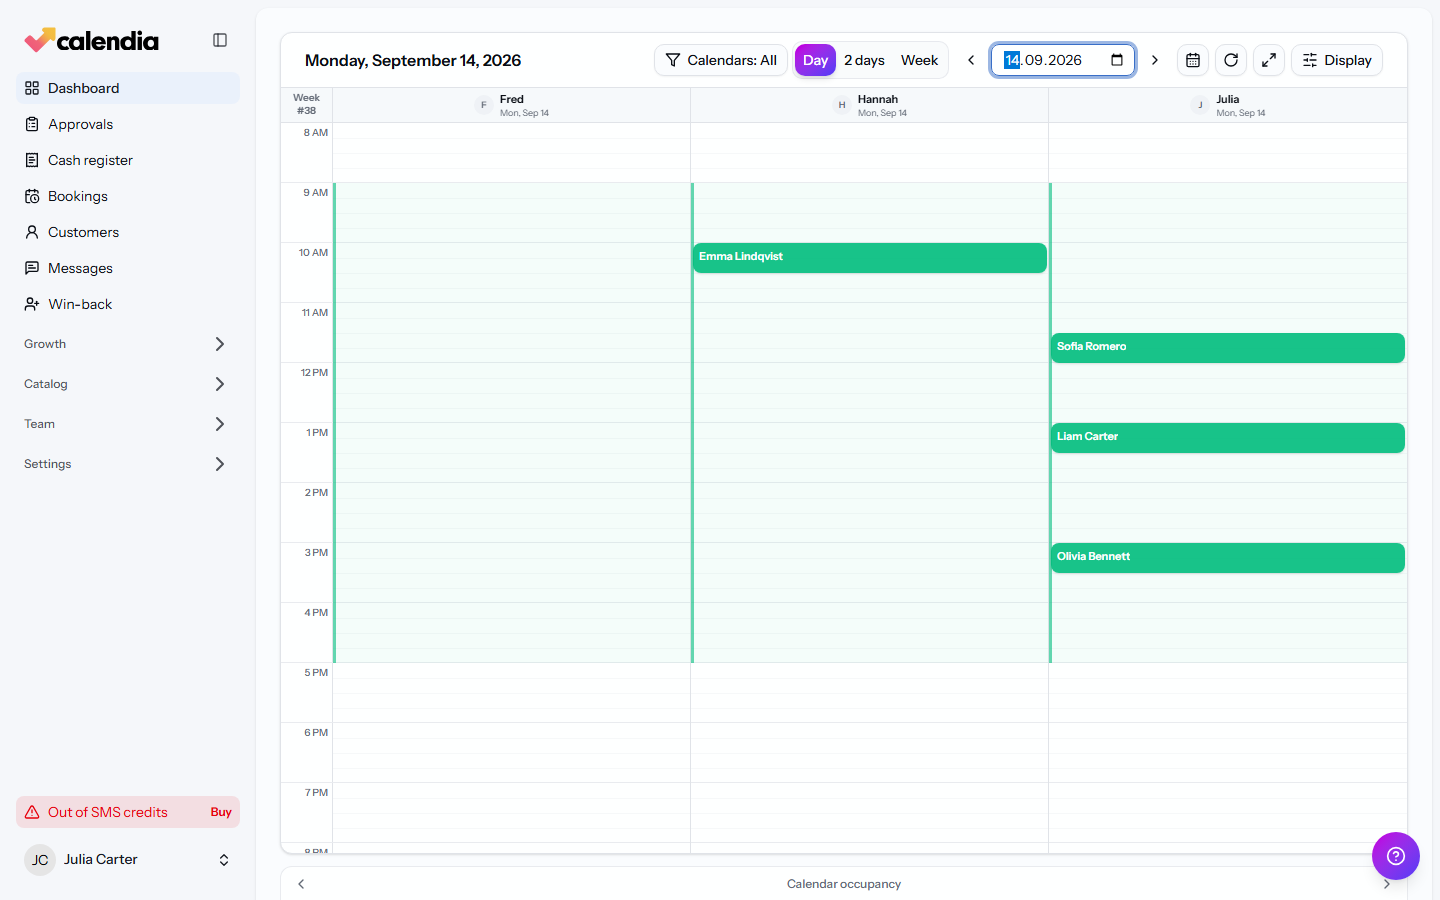
Want more than the calendar shows? Click Add section to drop in extra cards — things like Today's revenue, Top services today, or Bookings by hour — and remove any card you don't need with the small close icon in its corner.
The date row attached below the calendar shows booked time as a share of available working hours. Click a date to open that day; use the single arrows to move one day and the double arrows to move a week. Hover over a date for booked and available hours, including the employee breakdown. Days off have a gray background. See Create a booking for more about the calendar.
Your account menu
Click your name near the bottom of the sidebar to open your account menu. From there you can switch Language (12 languages available), pick Appearance (light, dark, or match your system), choose a Color theme for the dashboard, jump into Settings, or Log out.
Getting help
The round help button in the bottom-right corner of every page is the fastest way to get unstuck: click it to search the help articles without leaving what you are doing. If an article doesn't answer your question, choose Start a chat in the same panel to message us; an assistant answers first and hands off to a person when needed. You can also open the full help center from Help in your account menu.
Next, head over to Set up your business profile to get your workspace details right, then invite your team and share your online booking page.
Related articles
Set up your business profile
Add your workspace name, branding, currency, timezone, and legal details so bookings and receipts show the right information.
Invite your team
Add employees, choose their role, and set whether they can be booked so your calendar is ready for real appointments.
Share your online booking page
Find your public booking link, embed a booking widget on your own website, and generate a trackable QR code to share it.