Set up your business profile
Add your workspace name, branding, currency, timezone, and legal details so bookings and receipts show the right information.
Before you invite your team or share your booking page, spend a few minutes on your business profile. It controls what customers see and what appears on receipts.
Before you start
- You'll need your legal business details (country, VAT rate) if you plan to use the cash register or invoicing.
- Have your logo ready as an image file if you want to brand your booking page.
Update your business details
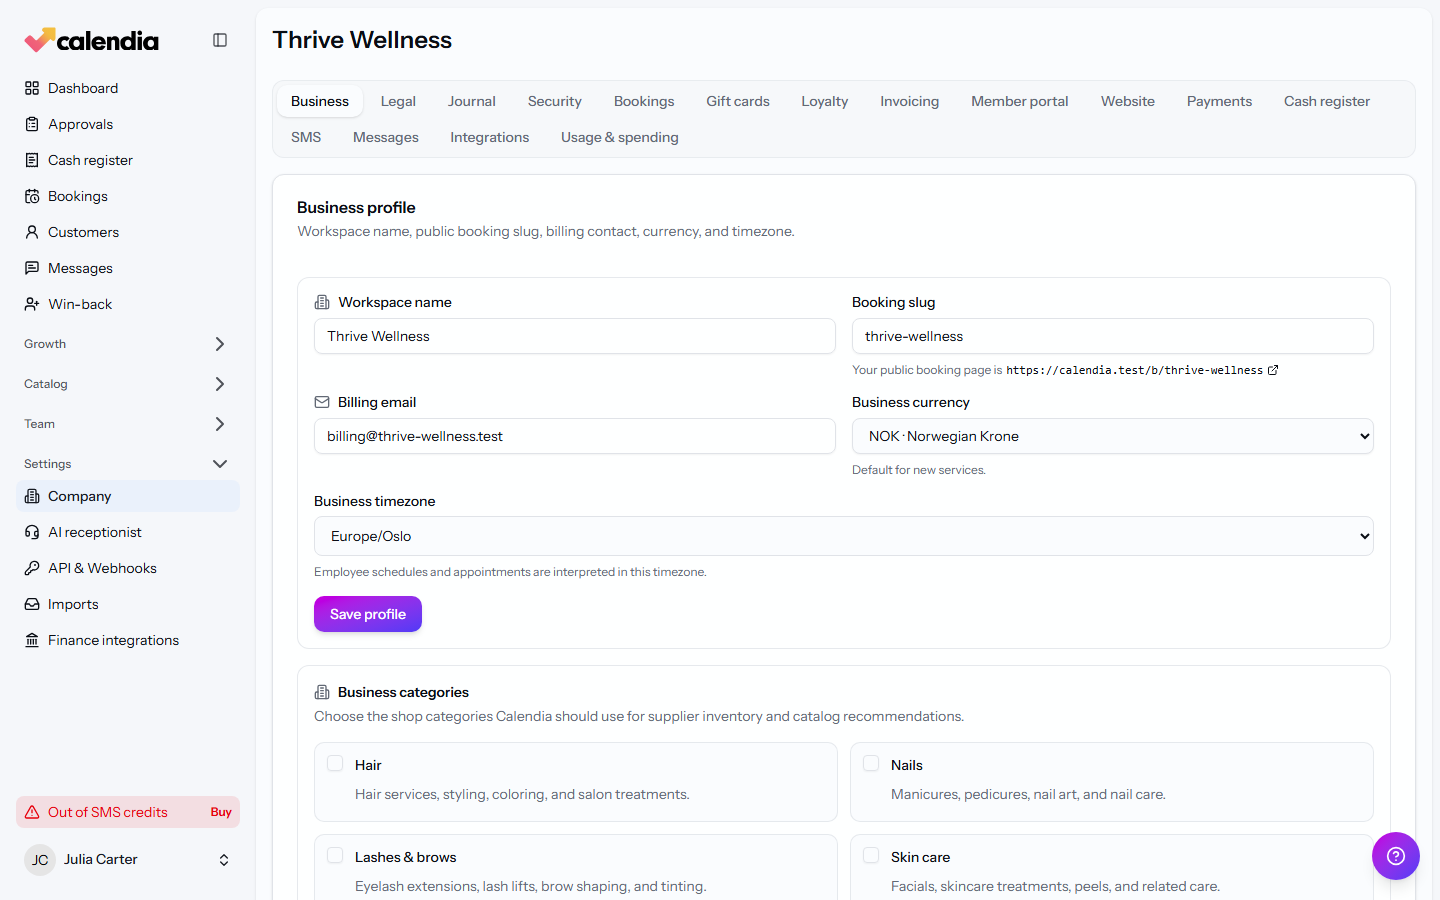
- Go to Company settings. The Business tab is open by default.
- Update your Workspace name and Booking slug — the slug is the part of your public booking page's web address, shown right below the field.
- Set your Business currency and Business timezone. Employee schedules and appointments are interpreted in this timezone.
- Add a Billing email for invoices and subscription notices.
- Click Save changes.
Add your logo and brand color
- Open the Bookings tab and scroll to Booking page appearance.
- Pick a brand color, or choose a custom one, to theme your public booking page.
- Choose a logo shape — square works well for a monogram, wide (4:1) suits a wordmark — then click Upload logo (max 4 MB).
- Square logos are displayed prominently on the booking page. Use an image without large transparent margins so the larger logo area is used well. Wide logos keep their wordmark proportions.
- Use Show booking page hero to show or hide the image, gallery or color banner at the top of the booking page. Hiding the hero keeps the uploaded images, so you can show them again later.
The preview updates as you change the logo shape and hero setting.
Add or remove business locations
On the Business tab, use Business locations to add physical or virtual locations and copy their individual booking links.
To permanently remove a location, click Delete beside it and review the confirmation. Calendia also removes unused cash registers, drawers and workstations assigned only to that location. Other location setup, such as location-specific hours, is removed with it.
A location cannot be deleted if it has bookings, cash-register or fiscal history, other historical records, or an active or payment-linked booking hold. The confirmation stays open and shows the reason when deletion is blocked. Use Deactivate instead when you need to preserve history.
Add legal seller details
If you invoice customers or use the cash register, open the Legal tab and fill in your Country, legal region, and Standard VAT rate (%). These details appear on fiscal receipts and cash-register reports, and VAT prefills on new products and register custom charges.
Set your opening hours
- Go to Business hours.
- Choose Business default or a specific location, then set opening and closing times for each day — leave a day blank to mark it Closed.
- Use Add exception to override a specific date, such as a holiday.
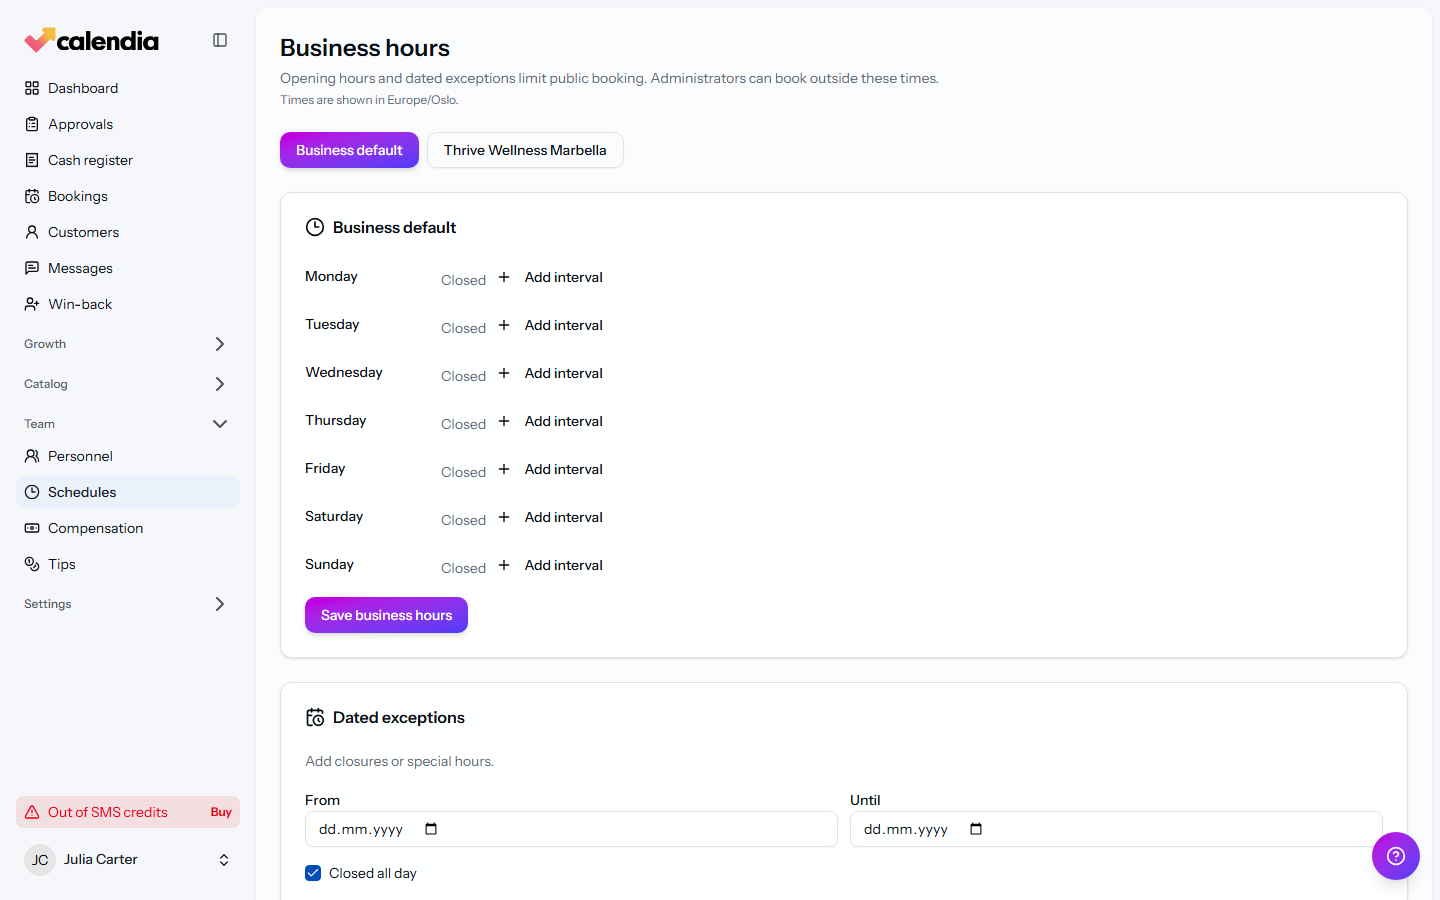
Customers can't book outside these hours or your dated exceptions, though staff with the right access can still book manually.
Frequently asked questions
Where do I set cancellation fees?
Cancellation fee timing lives in the Bookings tab of Company settings — see Online booking settings for the full walkthrough.
Can different locations have different hours?
Yes. On the Business hours page, select a location instead of Business default to give it its own schedule, or leave it inheriting the business default.
Related articles
Welcome to Calendia
A quick tour of the sidebar, your calendar dashboard, and where to find help when you need it.
Share your online booking page
Find your public booking link, embed a booking widget on your own website, and generate a trackable QR code to share it.
Subscription and billing
Choose how you're billed, start your subscription, track usage-based charges, and manage invoices and payment methods.